
Step-by-Step Guide to Installing Outdoor Privacy Screens
Want to make your outdoor space more private? Many homeowners enjoy their backyard but want more privacy from their neighbors. Planting bamboo, creating a vertical garden, or building a breeze-block wall are all good options. However, the easiest and quickest solution is to install an outdoor privacy screen. This affordable choice can quickly make your outdoor area more secluded.
Choosing the Right Outdoor Privacy Screen for You
When picking a privacy screen, think about how tough it is, how easy it is to look after, how much it costs, and whether it looks good with your home and garden.
Let me explain you in a simple guide how to choose outdoor privacy screens:
Natural Look
Use wooden lattice or bamboo screens for a look that fits well with most gardens.
Low Maintenance
Choose vinyl or composite materials as they don’t need much upkeep and are durable against weather.
Eco-Friendly
Bamboo is good for the environment because it’s renewable. Green screens also help local plants and animals.
Budget-Friendly
Bamboo and fabric screens are cheaper options.
Durability
Metal screens, like wrought iron or corten steel, last a long time and handle weather well. Composite screens also resist rot and bugs.
Modern Style
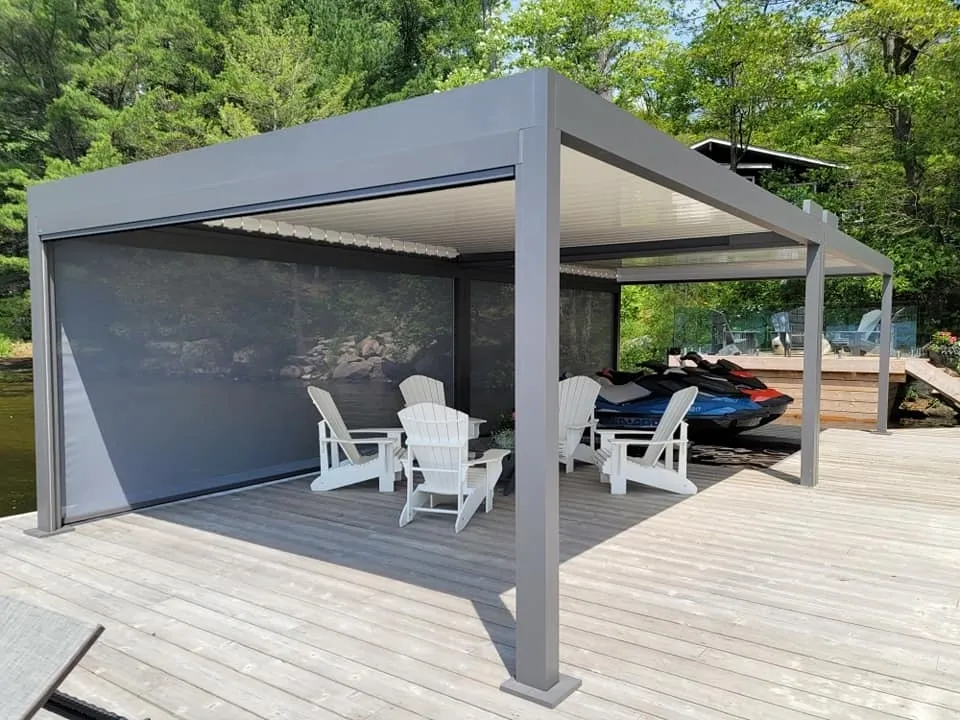
For a modern home, look for sleek glass or stylish vinyl and metal screens.
Temporary Solution: Fabric screens are easy to put up and take down when you need them.
Support for Plants
Wooden lattice, metal, or green screens are great if you want to grow climbing plants. They help plants climb and can turn into a green wall over time.
DIY vs. Professional Installation
When installing an outdoor privacy screen, you can choose to do it yourself (DIY) or hire professionals. Here’s a simple explanation:
DIY Installation:
Advantages
Save Money: You avoid paying for labour by doing the work yourself.
Personal Satisfaction: Completing the project can make you feel proud and accomplished.
Flexibility: You control the entire installation, adjusting things as you like.
Disadvantages
Time and Effort: It can be time-consuming and might require learning new skills.
Potential Mistakes: Without experience, you might make errors that could affect the screen’s look and function.
Tools Needed: You might need special tools that you don’t own.
Professional Installation:
Advantages:
Expertise: Professionals bring experience and skills, ensuring the screen is installed correctly.
Time-Saving: They can finish the job quickly.
Warranties: Many offer guarantees or warranties on their work.
Disadvantages:
Cost: It’s more expensive due to labour costs.
Less Control: You have less say in how the job is done.
Choosing between DIY and professional installation depends on your skills, budget, and how much time you have.
Choosing Between DIY and Professional Installation:
Consider the following factors when deciding between DIY and professional installation:
Skill Level and Experience
Assess your own DIY skills and experience. If you have prior experience with similar projects and feel confident in your abilities, DIY installation could be a viable option. Otherwise, it may be best to leave it to the professionals.
The Complexity of the Project
Evaluate the complexity of the installation. Some screen types, such as wooden lattice or fabric screens, may be more DIY-friendly, while others, like metal screens or glass screens, may require professional expertise.
Time and Resources
Consider the time you have available to dedicate to the project. DIY installation can be time-consuming, especially if you need to learn new skills or acquire specialized tools.
Budget
Compare the cost of professional installation against the potential savings of a DIY project. Factor in any additional tools or equipment you may need to purchase.
Installing Your Outdoor Privacy Screen
If you’re ready to install your own outdoor privacy screen, here’s a simple guide to help you:
Planning
Choose the spot for your screen to make sure it serves its purpose.
Check your local rules and get any permits you might need.
Materials and Tools
Collect all materials like screen panels and posts as listed in your screen’s guide.
Get your tools ready, like a drill, measuring tape, saw, and a post-hole digger.
Measuring
Measure and mark where you want your screen to go. Make sure everything is evenly spaced.
Setting Up
Clear the area of debris.
Dig holes for posts if needed, then put in the posts or assemble the frame as instructed.
Installing the Screen
Attach the screen panels to the posts or frames with screws or clips. Make sure everything is level and secure.
Finishing Up
Add any final touches like paint or sealant to protect the material.
Check that everything is firmly attached and works as it should.
Maintenance
Look after your screen as recommended to keep it in good shape, like cleaning or resealing it occasionally.
This step-by-step process should help you successfully install your privacy screen.
Wrapping Up
As you enjoy your morning coffee or a sunset, remember that a privacy screen is more than just a barrier for your space. It adds beauty to your outdoor area and sets the scene for your special moments. Make sure to pick one that fits well with your space! If you need extra guidance, our experts are ready to help you create your perfect outdoor spot. Just reach out for a personal consultation. Your ideal private space is within reach with just a click!
Call Us @ (705) 645-8893