
How to Winterize a Three-Season Sunroom by Sealing Drafts and Adding Heat
The first step to a warmer sunroom is to stop drafts before adding heat. Winterizing a three-season sunroom means inspecting panels, doors, and window seals, then reducing heat loss through cold glass and flooring with practical measures such as thermal curtains and a thick rug. Once you’ve addressed drafts, choose heating that suits the room and how you use it.
It’s frustrating when a space designed for relaxing beside Muskoka’s winter landscape feels too chilly to enjoy. You can often improve comfort by addressing gaps and cold surfaces first, rather than relying on a heater to do all the work.
This guide walks you through a practical winter-preparation plan: inspect panels and seals, block drafts, add temporary insulation to windows and floors, and consider heating with safe placement in mind. You’ll also learn when seasonal fixes may not be enough for year-round use. Thoughtful changes can help keep cold air out and make the room’s bright views more inviting through the colder months.
Key Takeaways
- Start by inspecting panels, window and door seals, and visible gaps so you can target the sources of drafts.
- Use temporary window coverings and floor layers to make cold surfaces more comfortable through winter.
- Compare your room’s insulation and glazing with the features of a four-season sunroom before deciding how much winter use to expect.
- Choose a heating approach that suits the room, and keep portable heaters safely clear of fabrics and enclosure panels.
- When seasonal fixes aren’t enough, explore how Sunspace Sunrooms can support a more comfortable enclosed living space.
Temporary insulation for windows and floors
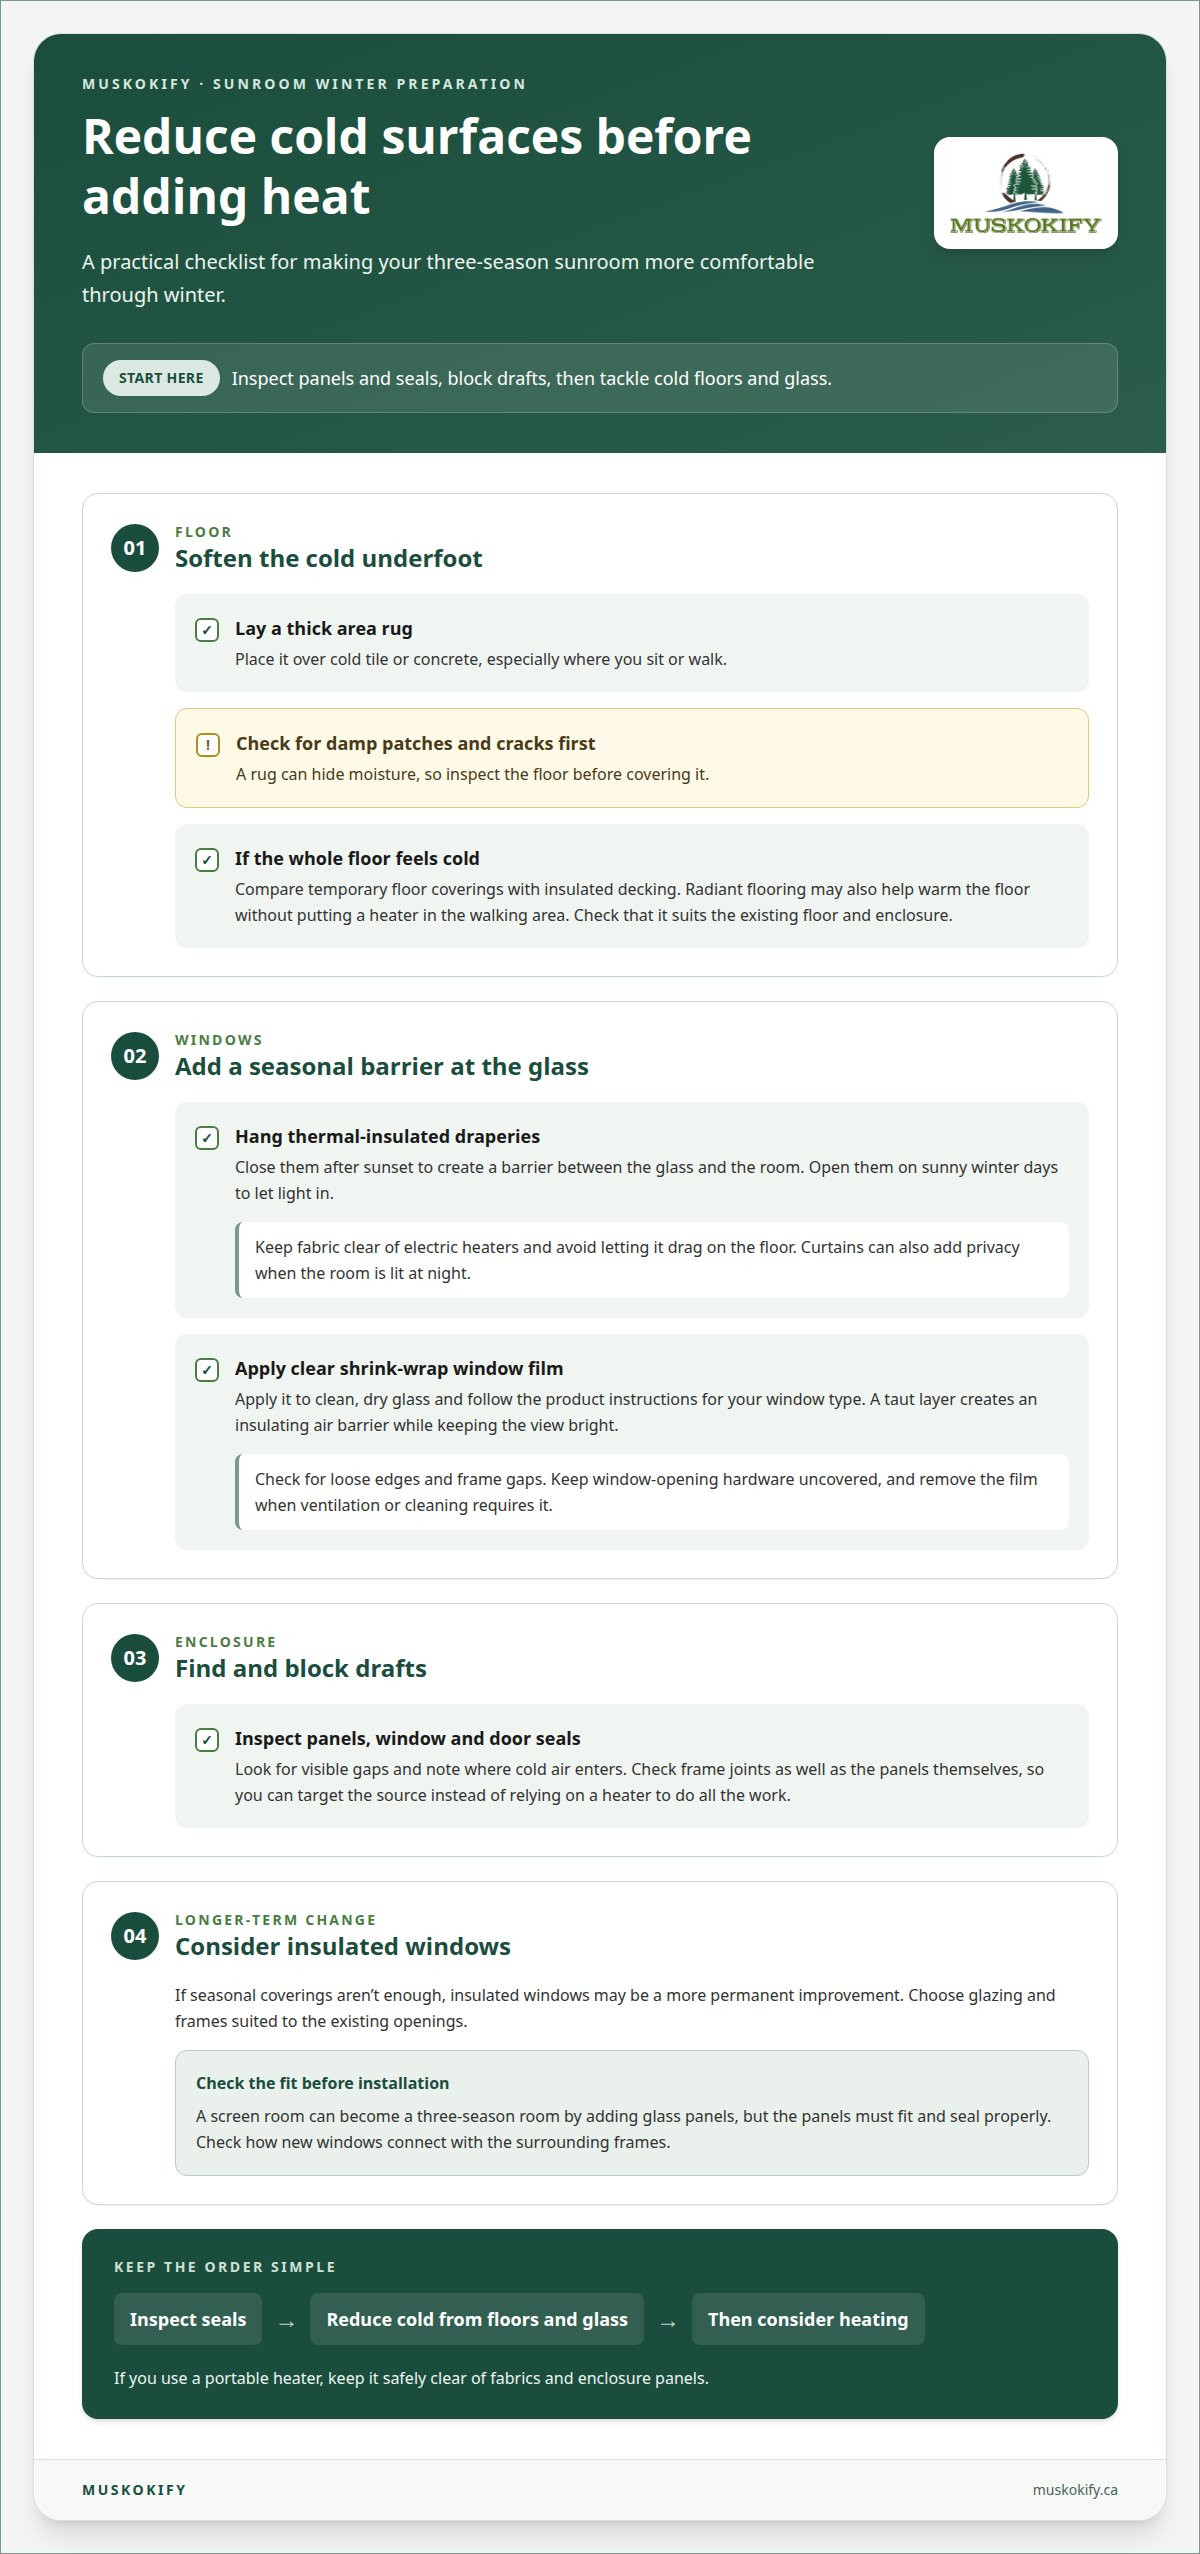
For a Canadian three-season sunroom, combine window insulation with rugs or insulated flooring to reduce cold surfaces and drafts. Thermal-insulated draperies and removable window film are practical seasonal options; insulated windows offer a more permanent improvement.
- Start with the floor: place a thick area rug over cold tile or concrete, especially where you sit or walk. Check for damp patches and cracks first, since a rug can hide moisture. If the floor feels cold throughout the room, compare temporary coverings with insulated decking instead of relying on an electric heater alone.
-
Add radiant flooring or insulated decking
Consider radiant flooring if you want warmth underfoot without placing a heater in the walking area. First check the existing floor construction and how the room is enclosed, since the system needs to suit both. Insulated decking can help limit heat loss through the floor; review how it fits the deck and sunroom structure before choosing this longer-term change.
-
Hang thermal-insulated draperies
Hang thermal-insulated draperies across the windows and close them after sunset to create a barrier between the glass and the room. Open them on sunny winter days to let light in. Make sure the fabric covers the window area without dragging on the floor or sitting close to an electric heater. Thermal curtains can also add privacy when the room is lit at night.
-
Apply insulating window film
Apply clear shrink-wrap window film to clean, dry glass, following the product instructions for your window type. A taut layer creates an insulating air barrier while keeping the view bright. Check for loose edges and gaps around the frame, where cold air can still enter. Avoid covering hardware needed to open the windows, and remove the film when ventilation or cleaning requires it.
-
Install insulated windows
If seasonal coverings aren’t enough, consider insulated windows as a more permanent upgrade. Choose glazing designed for the sunroom enclosure, with dimensions and frames suited to the existing openings. A screen room can become a three-season room by adding glass panels, but panel fit and sealing matter. Check how new windows connect with surrounding frames before installation.
WHAT’S THE DIFFERENCE BETWEEN A THREE-SEASON SUNROOM AND A FOUR-SEASON SUNROOM?
A three-season room usually offers shelter from wind and rain, but less insulation than the main house. A four-season room is designed for year-round use, typically with insulated frames and double-pane windows.
Winterizing may make an existing room more comfortable for occasional use, while conversion involves a larger change to its enclosure and structure. The right choice depends on how often you want to use the space and how its current panels, frames, and insulation perform.
Canadian building-code and permit requirements can depend on your municipality and the work involved. Before changing the structure, ask your municipal building department which requirements apply to your project.
There isn’t one fixed scope for winterizing a three-season room. The work depends on whether you’re adding temporary barriers, replacing windows, changing the heating, or altering the structure.
- Identify the type of enclosure you have. A seasonal porch enclosure may use screens or removable panels to reduce exposure to outdoor conditions. A three-season room typically has glass panels that close against wind and rain, but its frames, walls, and ceiling may provide less insulation than the home. Since “sunroom” can describe either type, look at the actual materials rather than relying on the room’s name.
For example, note whether the panels are fixed or removable and whether the frames feel insulated. These details help distinguish a weather barrier from an enclosure designed for winter temperatures.
- Assess how the room handles winter. A three-season room may feel much colder than the adjoining home because its walls and ceiling have less insulation. Glass panels can reduce wind exposure, but they don’t make the space equivalent to a four-season room. Note when the room becomes uncomfortable, such as after sunset or during a cold snap, and whether the cold comes through the floor, windows, or frame joints.
This observation helps distinguish a draft problem from broader heat loss. A temporary curtain may address a cold window, while persistently cold floors point to another part of the enclosure.
- Compare seasonal improvements with conversion. Choose winterization if you mainly want occasional use and can improve comfort with targeted measures. Consider conversion when regular winter use is the goal and the existing enclosure needs more than temporary barriers. Four-season rooms typically have insulated frames and double-pane windows, and are designed to withstand snow loads.
Before deciding, list the changes needed to the panels, windows, heating, and structure. This makes the difference between a seasonal improvement and a year-round conversion clearer.
- Plan around the existing structure. A three-season room may not be designed for the same winter conditions as a four-season room. Assess proposed changes against the enclosure, roof, and supporting structure, especially if you plan to replace panels or alter frames. In Muskoka, consider how winter temperatures, snow, and wind affect the room’s intended use.
Keep the goal practical: occasional shelter from the cold calls for a different plan than daily winter living. Confirm local requirements before structural work begins.
Heating options, including HVAC and portable heaters
Choose heating based on how often you use the room, its insulation, and its connection to your home. In winter, reduce heat loss first, then select a heat source suited to the enclosure.
- Assess whether the home’s heating system can serve the room. A sunroom connected to the home’s HVAC system can receive heating and cooling, helping regulate temperatures through changing seasons. Check whether existing ductwork reaches the addition and whether the enclosure can retain the heat delivered. A ductless mini-split is another option because it can provide heating and cooling without extending existing ducts.
For example, a room used throughout the year may benefit from more consistent temperature control than one used occasionally. Consider the windows, floor, and wall insulation alongside the heating equipment.
- Compare fixed heat with radiant flooring. Baseboard heaters can provide warmth along the room’s perimeter, while radiant flooring warms the floor itself. Radiant heat avoids placing a traditional heater or fireplace in the living area, preserving space for chairs and a clear view outdoors. Consider the flooring and enclosure before choosing either system.
If you’re considering a longer-term addition, think about how the heating method fits the room’s construction and planned use. A system designed around the room can feel different from a portable unit moved between spaces.
- Use an electric heater or electric fireplace for targeted warmth. A portable electric space heater can warm the area where you sit, while an electric fireplace can provide heat in a defined spot. These options may suit a room that isn’t designed to use the home’s HVAC system. Unplug an electric heater when you’re not using the sunroom.
For a low-level heat source during winter, the recommended setting is 45°F to 50°F. This can help maintain a modest baseline rather than heating the room for full-time comfort.
- Place portable heaters with clearance and stability in mind. Choose a heater approved for indoor use and set it on a stable, non-flammable surface. Keep it away from curtains, furniture, vinyl panels, and temporary vinyl sheeting. Leave clearance on every side, and keep exits open so the heater doesn’t obstruct movement through the enclosure.
Use a space heater with tip-over shutoff and overheat protection. Don’t run it through an overloaded outlet, especially when lights or other appliances share that outlet. Keep airflow and access to doors clear.
- Match the heat source to your winter routine. If you use the sunroom only briefly, targeted electric heat may suit those visits. For regular use, compare baseboard, radiant flooring, HVAC, and ductless mini-split options against the room’s insulation and layout. Heating can’t compensate for heat escaping through a poorly sealed enclosure, so consider both together.
Inspecting and replacing window and door weatherstripping
Inspect every window and door before winter, including frames and corners where cold air can slip inside. Clean the glass and screens first so you can spot small tears, loose seals, and gaps clearly.
-
Secure windows and inspect weatherstripping
Clean each window and screen, then check that latches close the sash firmly against its frame. Look for flattened, cracked, or detached weatherstripping around windows and the sunroom door. Small screen holes can also admit cold air and pests, so note any tears while the screen is visible. Let washed screens dry completely before reinstalling them or closing the enclosure for winter.
-
Replace weatherstripping and caulk frames
Replace worn weatherstripping where a window or door meets its frame, choosing a fit that lets the sash close securely. Seal small cracks in trim, corners, and around frames with exterior, outdoor-rated caulk. For wider gaps, fit a foam backer rod before applying caulk; it supports the sealant instead of leaving it to bridge the opening alone.
- Check the door’s lower edge. Close the door and look for daylight beneath it or a visible gap along the threshold. Add a door sweep that meets the floor without catching when the door opens. Check the latch and hinges too: a door that doesn’t sit squarely can leave uneven gaps around the frame despite fresh weatherstripping.
- Test repaired seals from inside. On a cool, breezy day, move your hand slowly around the closed window and door edges to feel for incoming air. Mark any draft with removable tape, then inspect that spot for a missed corner, loose strip, or break in the caulk. Recheck after repairs, especially where frame sections meet.
- Add thermal curtains for evening protection. Hang thermal or vinyl-backed curtains over windows and close them after sunset to help block cold air and limit heat loss. Open them during sunny weather to let daylight warm the room. Make sure the curtains don’t obstruct window latches, and keep fabric clear of any heater. This added barrier complements repaired seals, but doesn’t replace them.
- Watch for recurring drafts and moisture. Check the same window corners and door threshold after wind or rain. If a seal separates again, look for movement, dampness, or a gap too wide for caulk alone. Addressing leaks and drafts can reduce heat loss and winter energy bills, while dry, secure screens and windows help keep the enclosure ready for colder weather.
Inspecting seals, roof panels, caulking, and glazing
Seal drafts at window and door frames with weatherstripping, and use exterior caulk for small cracks. Wider gaps may need foam backer rod beneath the caulk.
To limit condensation, briefly open a door on mild days or use a small dehumidifier. Check panels and floors regularly, since moisture left in an enclosed room can contribute to mould.
- Inspect the enclosure from inside and outside. Look along each frame, glass panel, roof panel, and corner for loose seals, cracked caulking, or movement. Inside, check floors and trim for damp marks beneath windows. Outside, look for gaps where panels meet frames. A visible break in the seal can show where wind-driven rain or cold air may enter.
- Check the roof panels and glazing carefully. Scan for cracked, loose, or displaced panels, cloudy glazing, and water marks below roof joints. Inspect from a stable position on level ground. If you need a ladder to see a high area, place it on level ground. Don’t lean across the roof or put weight on a panel while inspecting it.
- Repair small gaps with the right seal. Clean and dry the frame before applying exterior, outdoor-rated caulk to small cracks in trim and corners. For a wider opening, insert foam backer rod first, then apply caulk over it. This supports the sealant instead of asking it to bridge a deep gap. Keep drainage openings clear while sealing.
- Check weatherstripping at moving joints. Open and close each window and door to see whether the seals stay in place and the panels meet their frames. Replace weatherstripping that has pulled away or no longer seals the joint. Use caulk on fixed seams, not moving edges that need to open. This distinction helps keep windows operable after repairs.
- Manage condensation and protect plants. If moisture forms on tightly enclosed panels, briefly open a door on a mild day or run a small dehumidifier. Wipe visible water from glass and floors, then check for damp trim. Move delicate plants indoors; group hardier plants away from cold glass to limit exposure to chilly surfaces.
- Decide whether repairs are enough. Repeated leaks, loose glazing, or cracked roof panels may call for more than seasonal caulking. Note each affected panel and frame before planning an upgrade. If the enclosure needs a closer assessment, arrange a sunroom project discussion to consider the next step.
Muskokify: Sunspace Sunrooms
Muskokify offers Sunspace Sunrooms for homeowners whose seasonal fixes aren’t enough for how they want to use their space. Custom-built solutions can create three-season or four-season living areas, helping you plan an enclosure around your home, cottage, and views.
Consider this next step if recurring drafts, cold panels, or limited winter use point to a larger enclosure change. Discuss how you want to use the room, the existing structure, and the landscape you want to keep in view. This can help shape a sunroom suited to your property and seasonal needs.
Contact Muskokify to discuss your sunroom plans.
Plan your next season of comfort
A thoughtful plan for winterizing a three-season sunroom starts with how you want to use it. Occasional winter visits may call for seasonal adjustments, while daily use may lead you to consider a more lasting enclosure upgrade. Keep your Muskoka view in mind as you plan, so the room stays connected to the landscape in every season.
Before making changes, write down what matters most: comfortable seating, clear sightlines, or a space that works through colder months. Clear priorities help shape the next step around your home or cottage and the way you live there.
Contact Muskokify to discuss your sunroom and take a considered next step toward a space you’ll enjoy in every season.
Frequently Asked Questions
How Do You Prepare a Sunroom for Winter in Muskoka?
In Muskoka, begin preparing your sunroom in September or October, before colder weather arrives. Decide whether you’ll heat the room or leave it unheated, then plan around its contents. Bring delicate summer plants indoors; group hardier plants away from cold glass. If the room will stay unheated, move wicker or rattan furniture into the house or basement, and cover outdoor furniture against winter weather.
How do you winterize a three-season sunroom step by step?
First decide how you’ll use the room during winter, because that affects what should stay inside. Remove delicate plants and items that could be damaged by freezing conditions. If you add clear porch sheeting, overlap its seams by a couple of inches to help limit drafts. Store reusable sheeting rolled rather than folded, which helps it stay clear for another season.
Is it safe to use a space heater in a three-season sunroom?
A portable heater is an option, but a temporary enclosure needs particular care. Keep the heater away from vinyl sheeting and panels, and unplug it when the room isn’t in use. Watch for condensation on tightly enclosed surfaces too. A heater doesn’t remove moisture, so briefly airing the room on a mild day or using a small dehumidifier can help manage dampness.
What heating options are suitable for a three-season sunroom in winter?
Beyond portable electric heat, options include a wood-burning fireplace or gas insert. These involve different installation and fuel arrangements from electric heaters, so consider how each fits the room and its structure. Radiant flooring is another possibility if you want warmth without placing a heater in the living area. The room’s construction and intended use help guide the choice.
Can temporary window insulation film withstand Canadian winter temperatures?
There isn’t one answer for every film or Canadian winter. Check the product’s stated temperature range and intended use, then follow its instructions for your window type. Treat the film as a seasonal layer, not a permanent glazing replacement. If you remove clear sheeting for storage, roll it rather than folding it to help preserve clarity for reuse.